
Multisite installation
You can set up Patchstack on each of your network sites as easily as you would set it up on regular WordPress sites. Keep in mind that each site must be added to the Patchstack App individually and will take up a slot on your account. Every subsite of your multisite network will have an individual API key which has to be inserted correctly.
Here are the steps to take to install Patchstack on your multisite network.
Step #1 — Adding the site to Patchstack App
Section titled “Step #1 — Adding the site to Patchstack App”To install Patchstack on the multisite network, the easiest way is to do it via the Patchstack App.
- Navigate to Sites on the Patchstack App and click on + Add new (at the top bar).
- Type in your domain and click Continue to plugin sync
- You are then shown a popup like this:
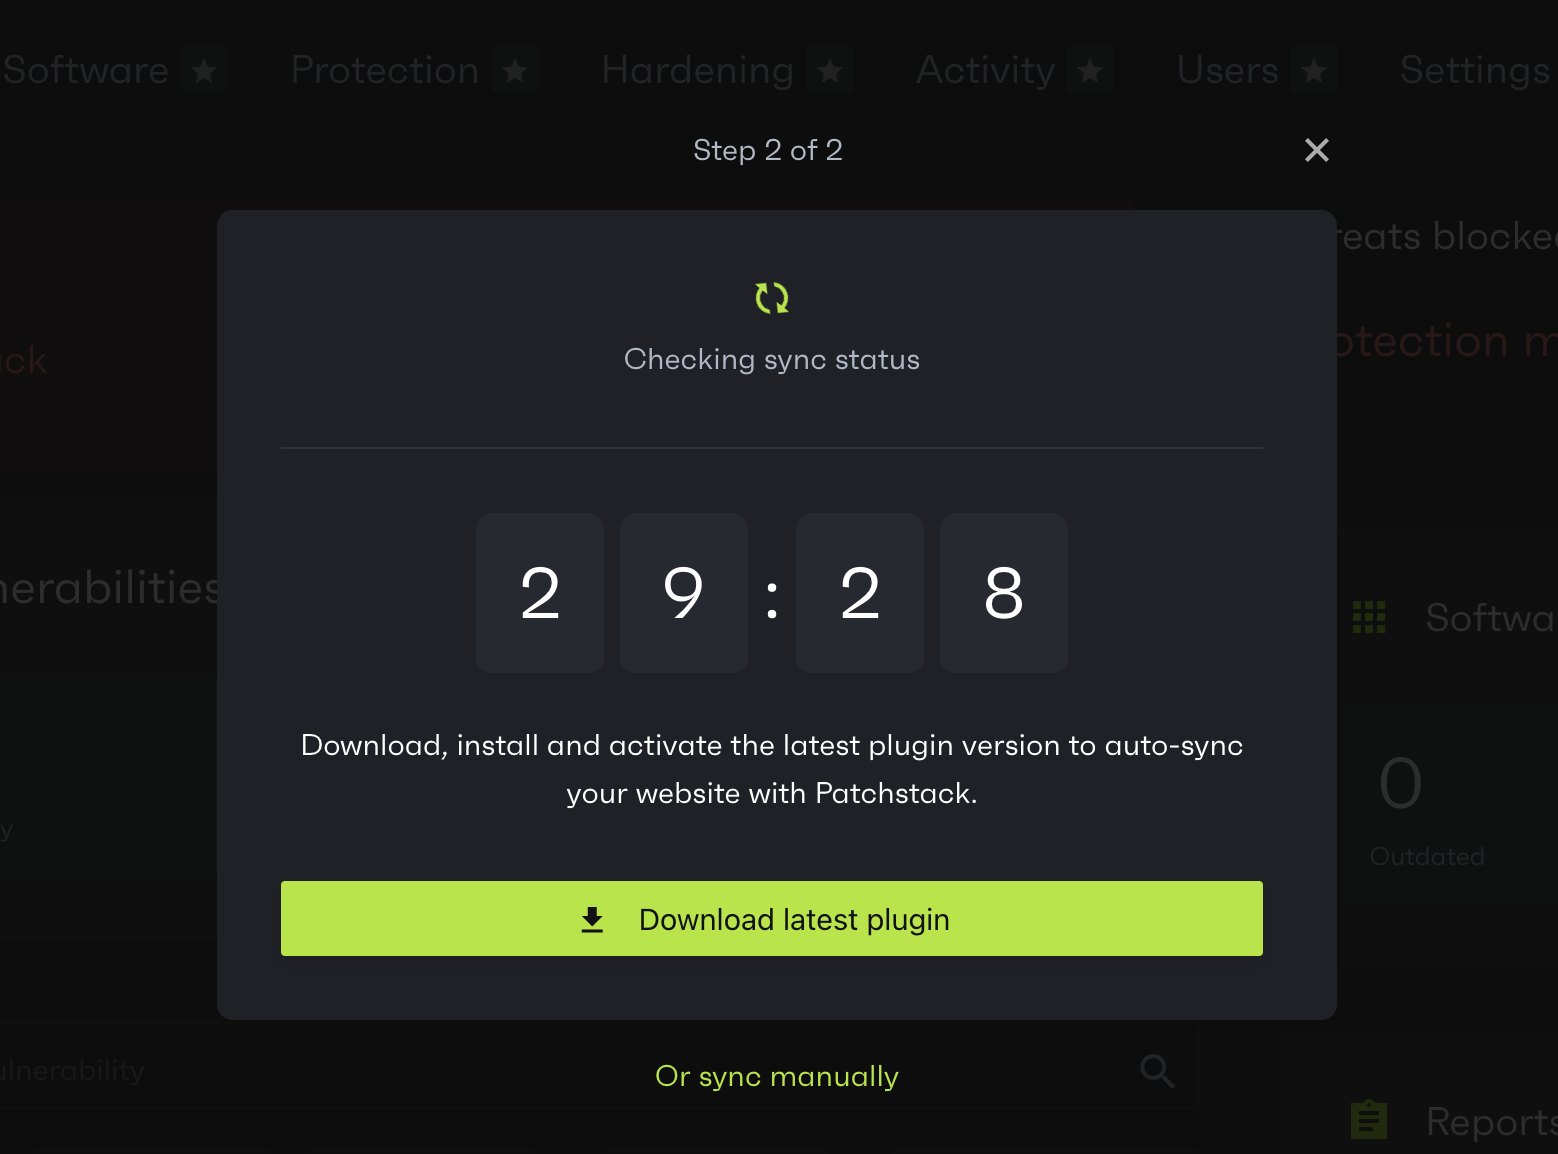
- Click on Or sync manually link and copy the API key
Step #2 — Install the plugin
Section titled “Step #2 — Install the plugin”- Go to your WordPress Network Admin and navigate to Plugins > Add New Plugin
- Search for “Patchstack”
- Install the “Patchstack – WordPress & Plugins Security” plugin
- Once the plugin is installed, click Network Activate
- You will then see screen as such:
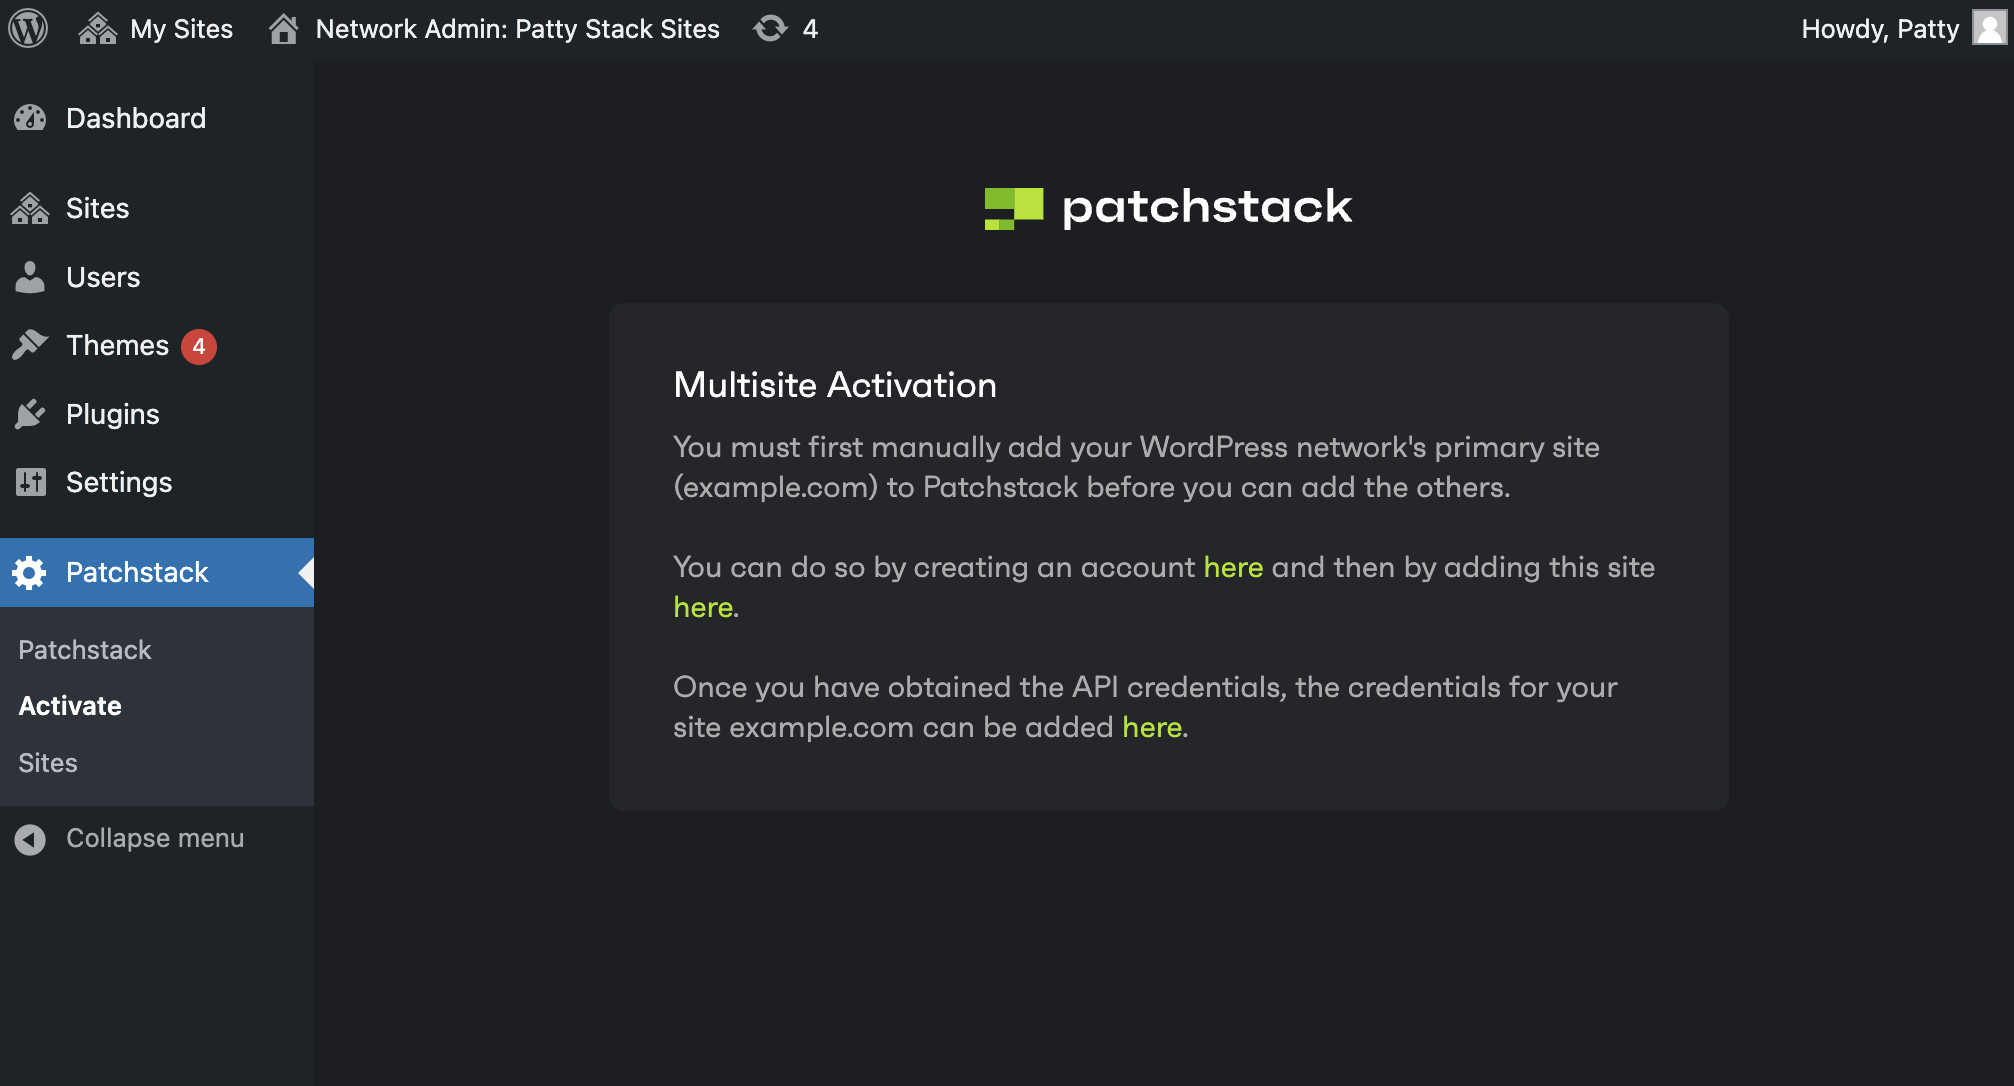
- Click on the last link in this box, then paste the API key to that field, and click “Sync”
- Your main site is now connected and synchronized with Patchstack
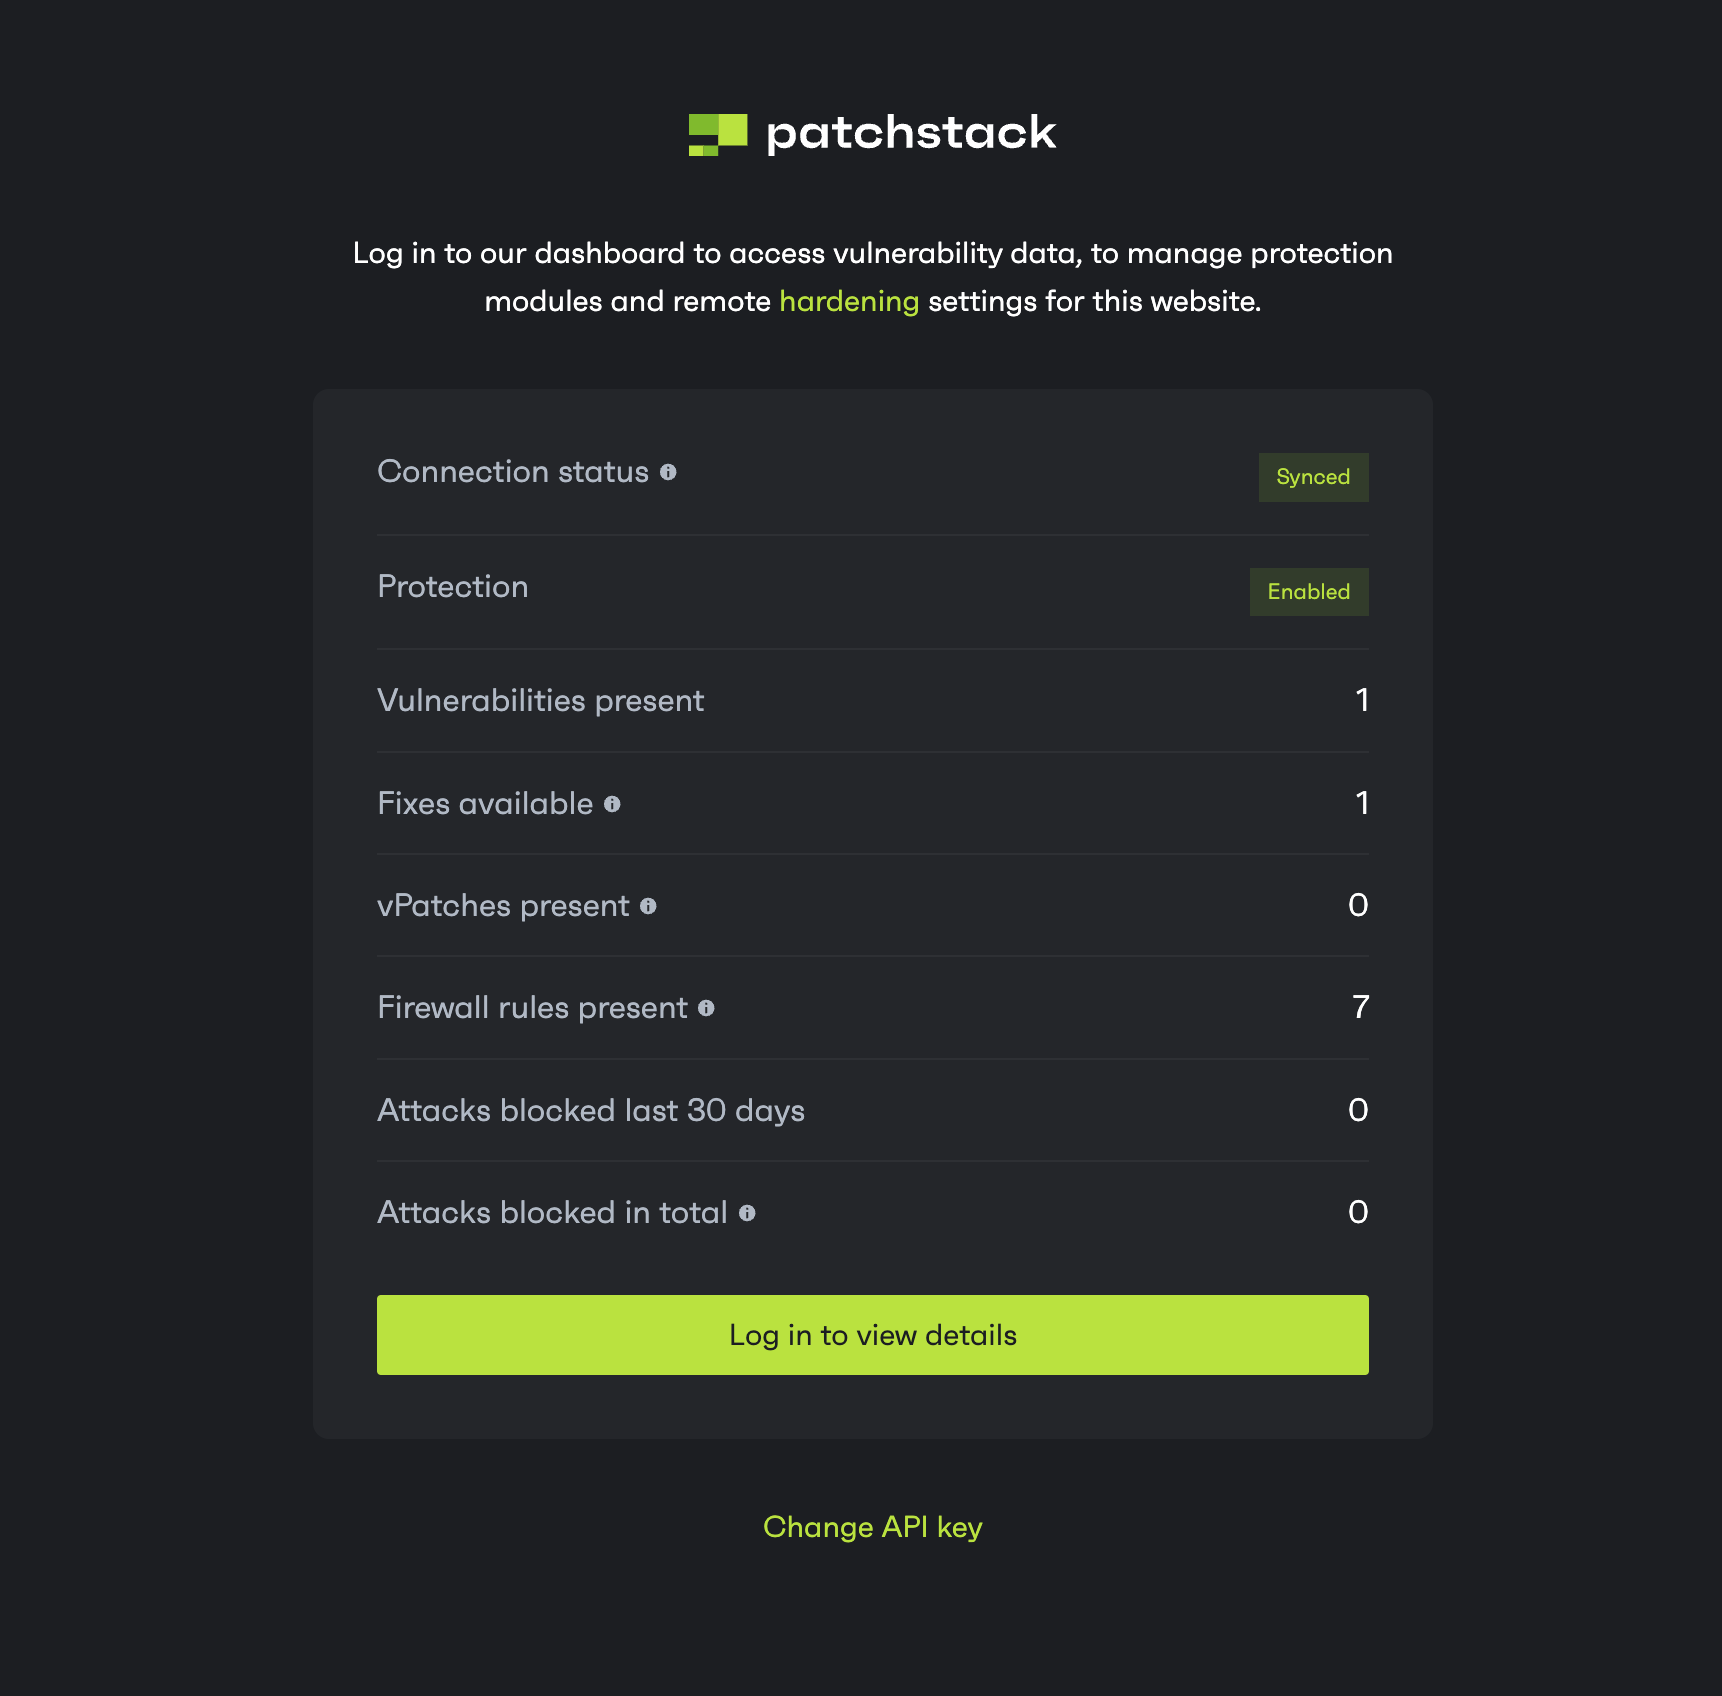
- You should see a success screen in Patchstack App and in your plugin as well
Step #3 - Connecting the subsites
Section titled “Step #3 - Connecting the subsites”To connect the subsites, repeat the process in step 1 - add your site to Patchstack App, and then get the plugin API key.
- In your Network Admin, navigate to Patchstack > Sites
- You’ll see screen as such:
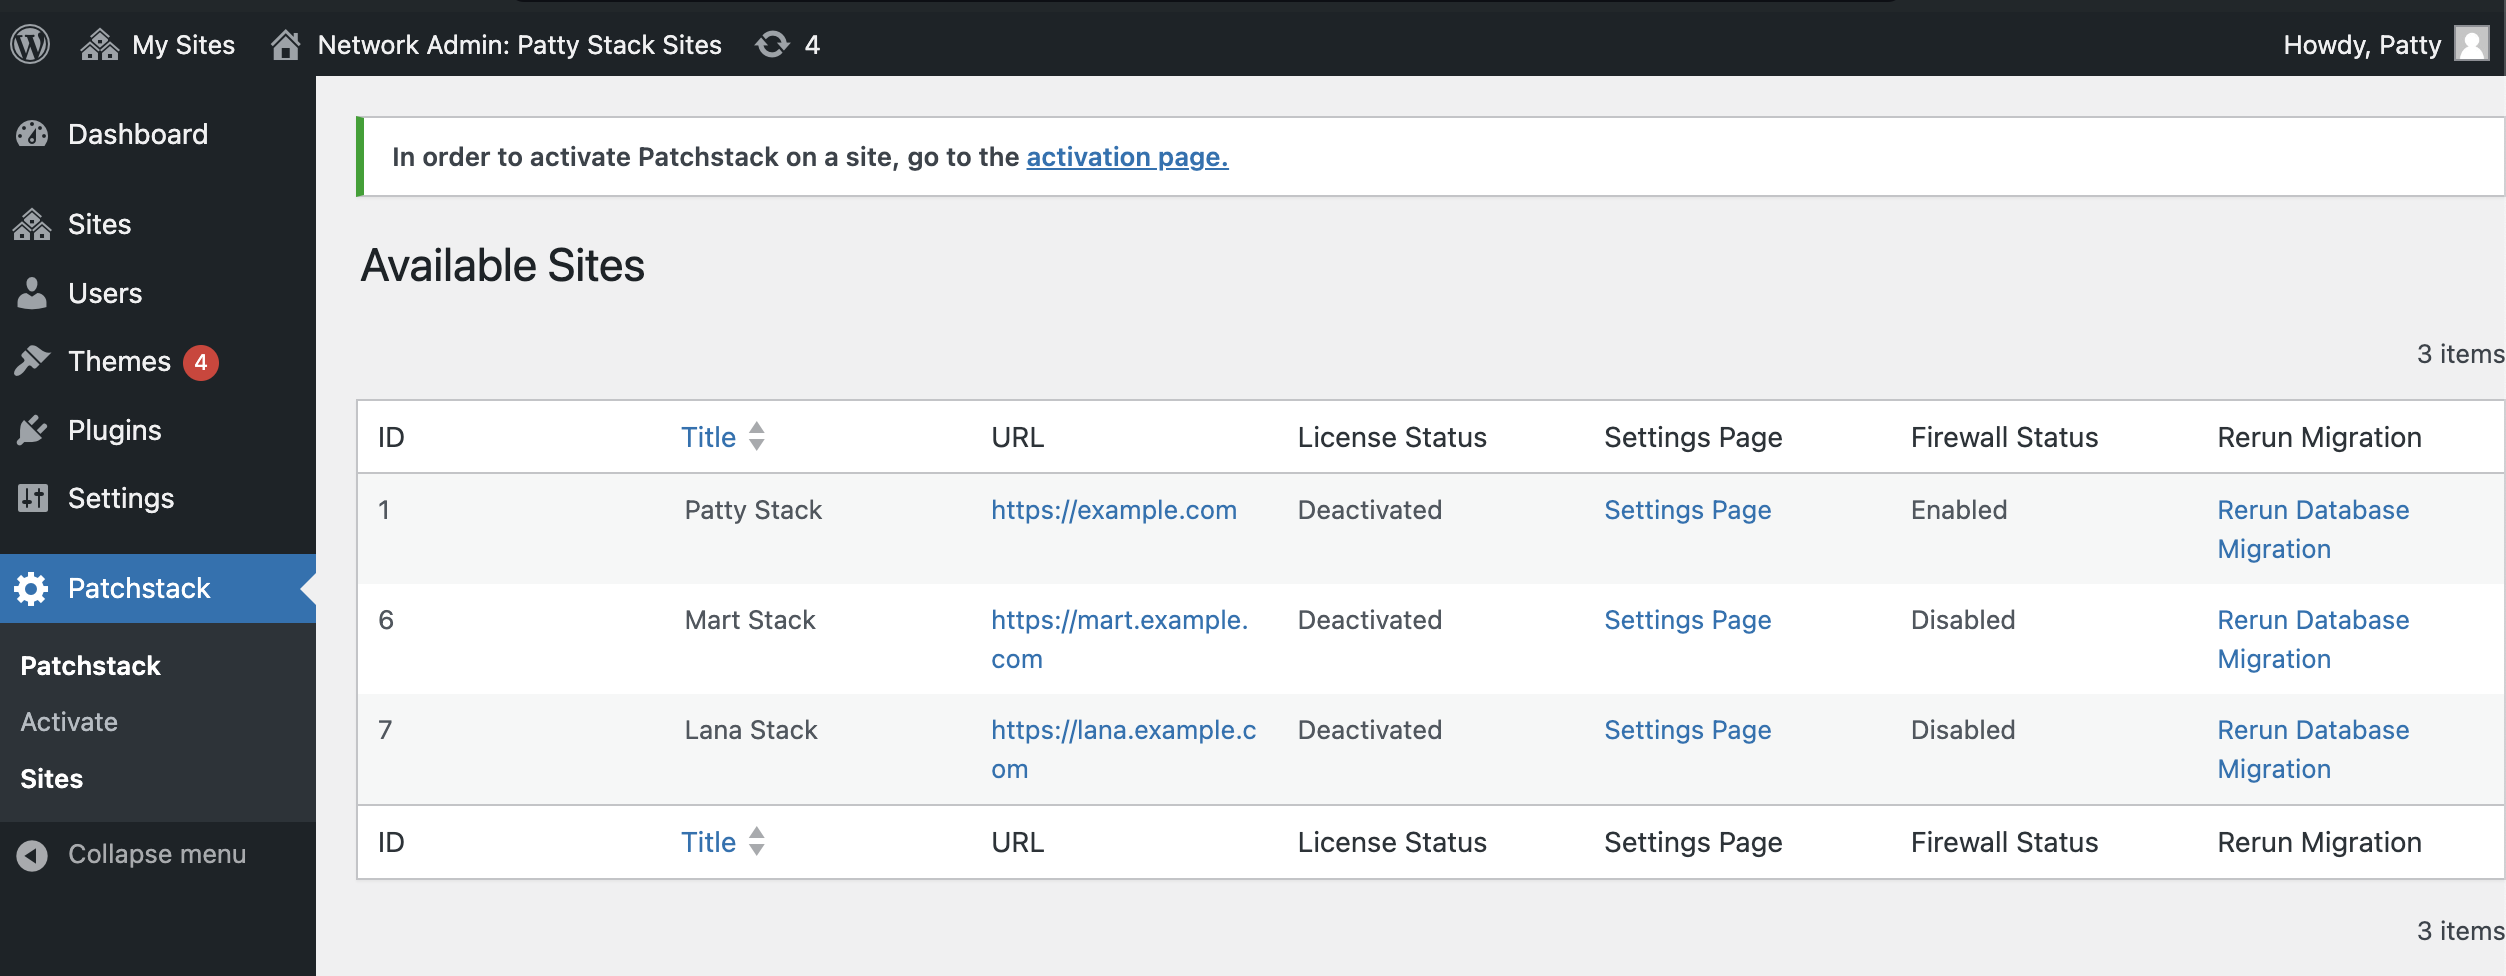
- To add an API key to the corresponding site, click “Settings page” and add the API key the same way as you did for the main site
Remote management and plugin updates
Section titled “Remote management and plugin updates”WordPress plugins, themes and core files are shared across the network. A subsite’s Patchstack API key does not, by default, authorize commands that change shared software, reset shared 2FA enrollment or flush the shared cache.
On the primary network, a network administrator can allow these commands from the primary site’s Patchstack App connection:
- Open Network Admin > Patchstack > Sites.
- Below the sites table, enable Allow remote management from the primary site’s Patchstack dashboard.
- Click Save changes.
This is the network option patchstack_network_plugin_updates, which is off by default. Despite its name, the grant covers WordPress/theme/plugin updates, plugin activation/deactivation/deletion, and 2FA/cache resets. Use the primary site’s connection in Patchstack App; subsite keys do not inherit the grant. WordPress file-change restrictions still apply.
Only enable this if you trust every administrator of the primary site. An administrator there can connect it to another Patchstack account and use that connection to run these commands without being a network administrator.
For plugin updates already permitted by WordPress’s network automatic-update policy, the primary site’s connection can continue to update those plugins without enabling the broader grant. If automatic updates are off and you want manual dashboard updates, enable the checkbox above. An explicit network policy supplied through patchstack_allow_network_remote_management can veto either path; see the filter example.
Settings and shared files
Section titled “Settings and shared files”Most runtime settings and credentials are per-site. .htaccess rule selection and legacy automatic-update selections are network options. By default, the shared auto-prepend installer is controlled from the primary site of the primary network. Changing the option on a subsite does not allow it to install or remove that shared configuration. See WP options.
2FA enrollment belongs to the shared WordPress account. A code consumed or an account cooldown started on one site remains part of that account’s state on other sites.
Database updates and repair
Section titled “Database updates and repair”Each site has its own Patchstack log tables and schema version. Network activation does not synchronously rebuild every subsite. When the plugin initializes on a site with pending or missing tables, it schedules that site’s database work through WordPress cron. Older installations retain existing settings and log rows during the upgrade.
Administrators see a notice while a database update is pending or has failed. Its Run database update link can run the work manually, including when WordPress cron is disabled. Automatic retries stop after three failed attempts; check database permissions, free disk space and any reported index conflict before retrying.
A network administrator can also open Network Admin > Patchstack > Sites and use Rerun Database Migration for the affected site. This repairs that site’s tables and resets its retry state; it does not reset the other sites’ settings or upload state.
Conclusion
Section titled “Conclusion”You will have to add every subsite separately to the Patchstack App and insert the plugin API keys to every subsite.
After adding a site successfully, you’ll see stats of your site on your WordPress admin.
If you need further help, don’t hesitate to reach out to us via live chat at the bottom right corner!